Recipe idea: raw milk, coffee protein shake

This is protein shake is probably one of my favorite things to make with raw milk. It feels like I’m treating myself to a frozen, blended mocha from one of my favorite coffee shops.

It’s also RIDICULOUSLY easy to make!! I even have a no blender version! I have one almost every morning.
Here are some tips and tricks to make this process easy peasy:

1. Use cold brew coffee. This is also ridiculously easy to make. Yep, it’s been around for a while, obvs. But I am surprised by how few people know about it! Literally: add favorite coffee grounds + cold water, stick in fridge and “steep” for 12-24hrs. Longer is stronger! I love to make it in my cold brew French press. (aka: BIG French press!) It’s also less acidic than traditionally brewed coffee which I LOVE!
2. Use a chocolate protein powder to give it a mocha flavor. Another quick tip: we like to add a dash of Hersey’s Simply chocolate syrup to give it a tiny bit more chocolate-y flavor.

3. I have two ways of making this: in the blender with ice or just in a mason jar using my beverage mixer/milk frother tool. I love both! The blender way is a lot colder and requires a tiny bit more effort.

Here’s the recipe:
Cold Brew Frozen Mocha Protein Shake
Ingredients:
8oz raw cow’s milk
1/4 cup cold brew coffee (or to taste!)
1 scoop your favorite protein powder (I like chocolate the best! Vanilla is good too!)
Optional: a sploosh of Hershey’s Simply chocolate syrup.
Blender method: about 1 cup of ice

Directions:
Blender method

  1. add 1 cup ice to blender and blend until there are no large ice chunks

  2. add liquids (milk and coffee) and blend again. I blend “to feel” so if it looks like it’s too thin, I add a little more ice. If it’s not mixing well, I add a little more milk/coffee.

  3. add protein powder (and chocolate syrup if using) and blend again until smooth.

  4. Pour into your favorite glass. (I top mine with a little whipped cream when I’m feelin’ fancy) Enjoy!

Drink mixer/frother method:

  1. Add all ingredients to large cup (it expands!), NO ICE.

  2. Blend all ingredients until smooth.

  3. You can wait for it to settle or you can just drink it immediately. I usually just go for it when I’m using this method because I’m generally in a rush if I do this. ;)

Both methods work great and I use both regularly! I’ve even tried it with hot coffee. I add a dash of monk fruit if I make it with hot coffee because I use more coffee and less milk so it’s a little more bitter. (If you haven’t noticed, I have a sweet tooth….)

Raw milk is so versatile! We love to use it in everything!

Recipe idea: fruity overnight oats!

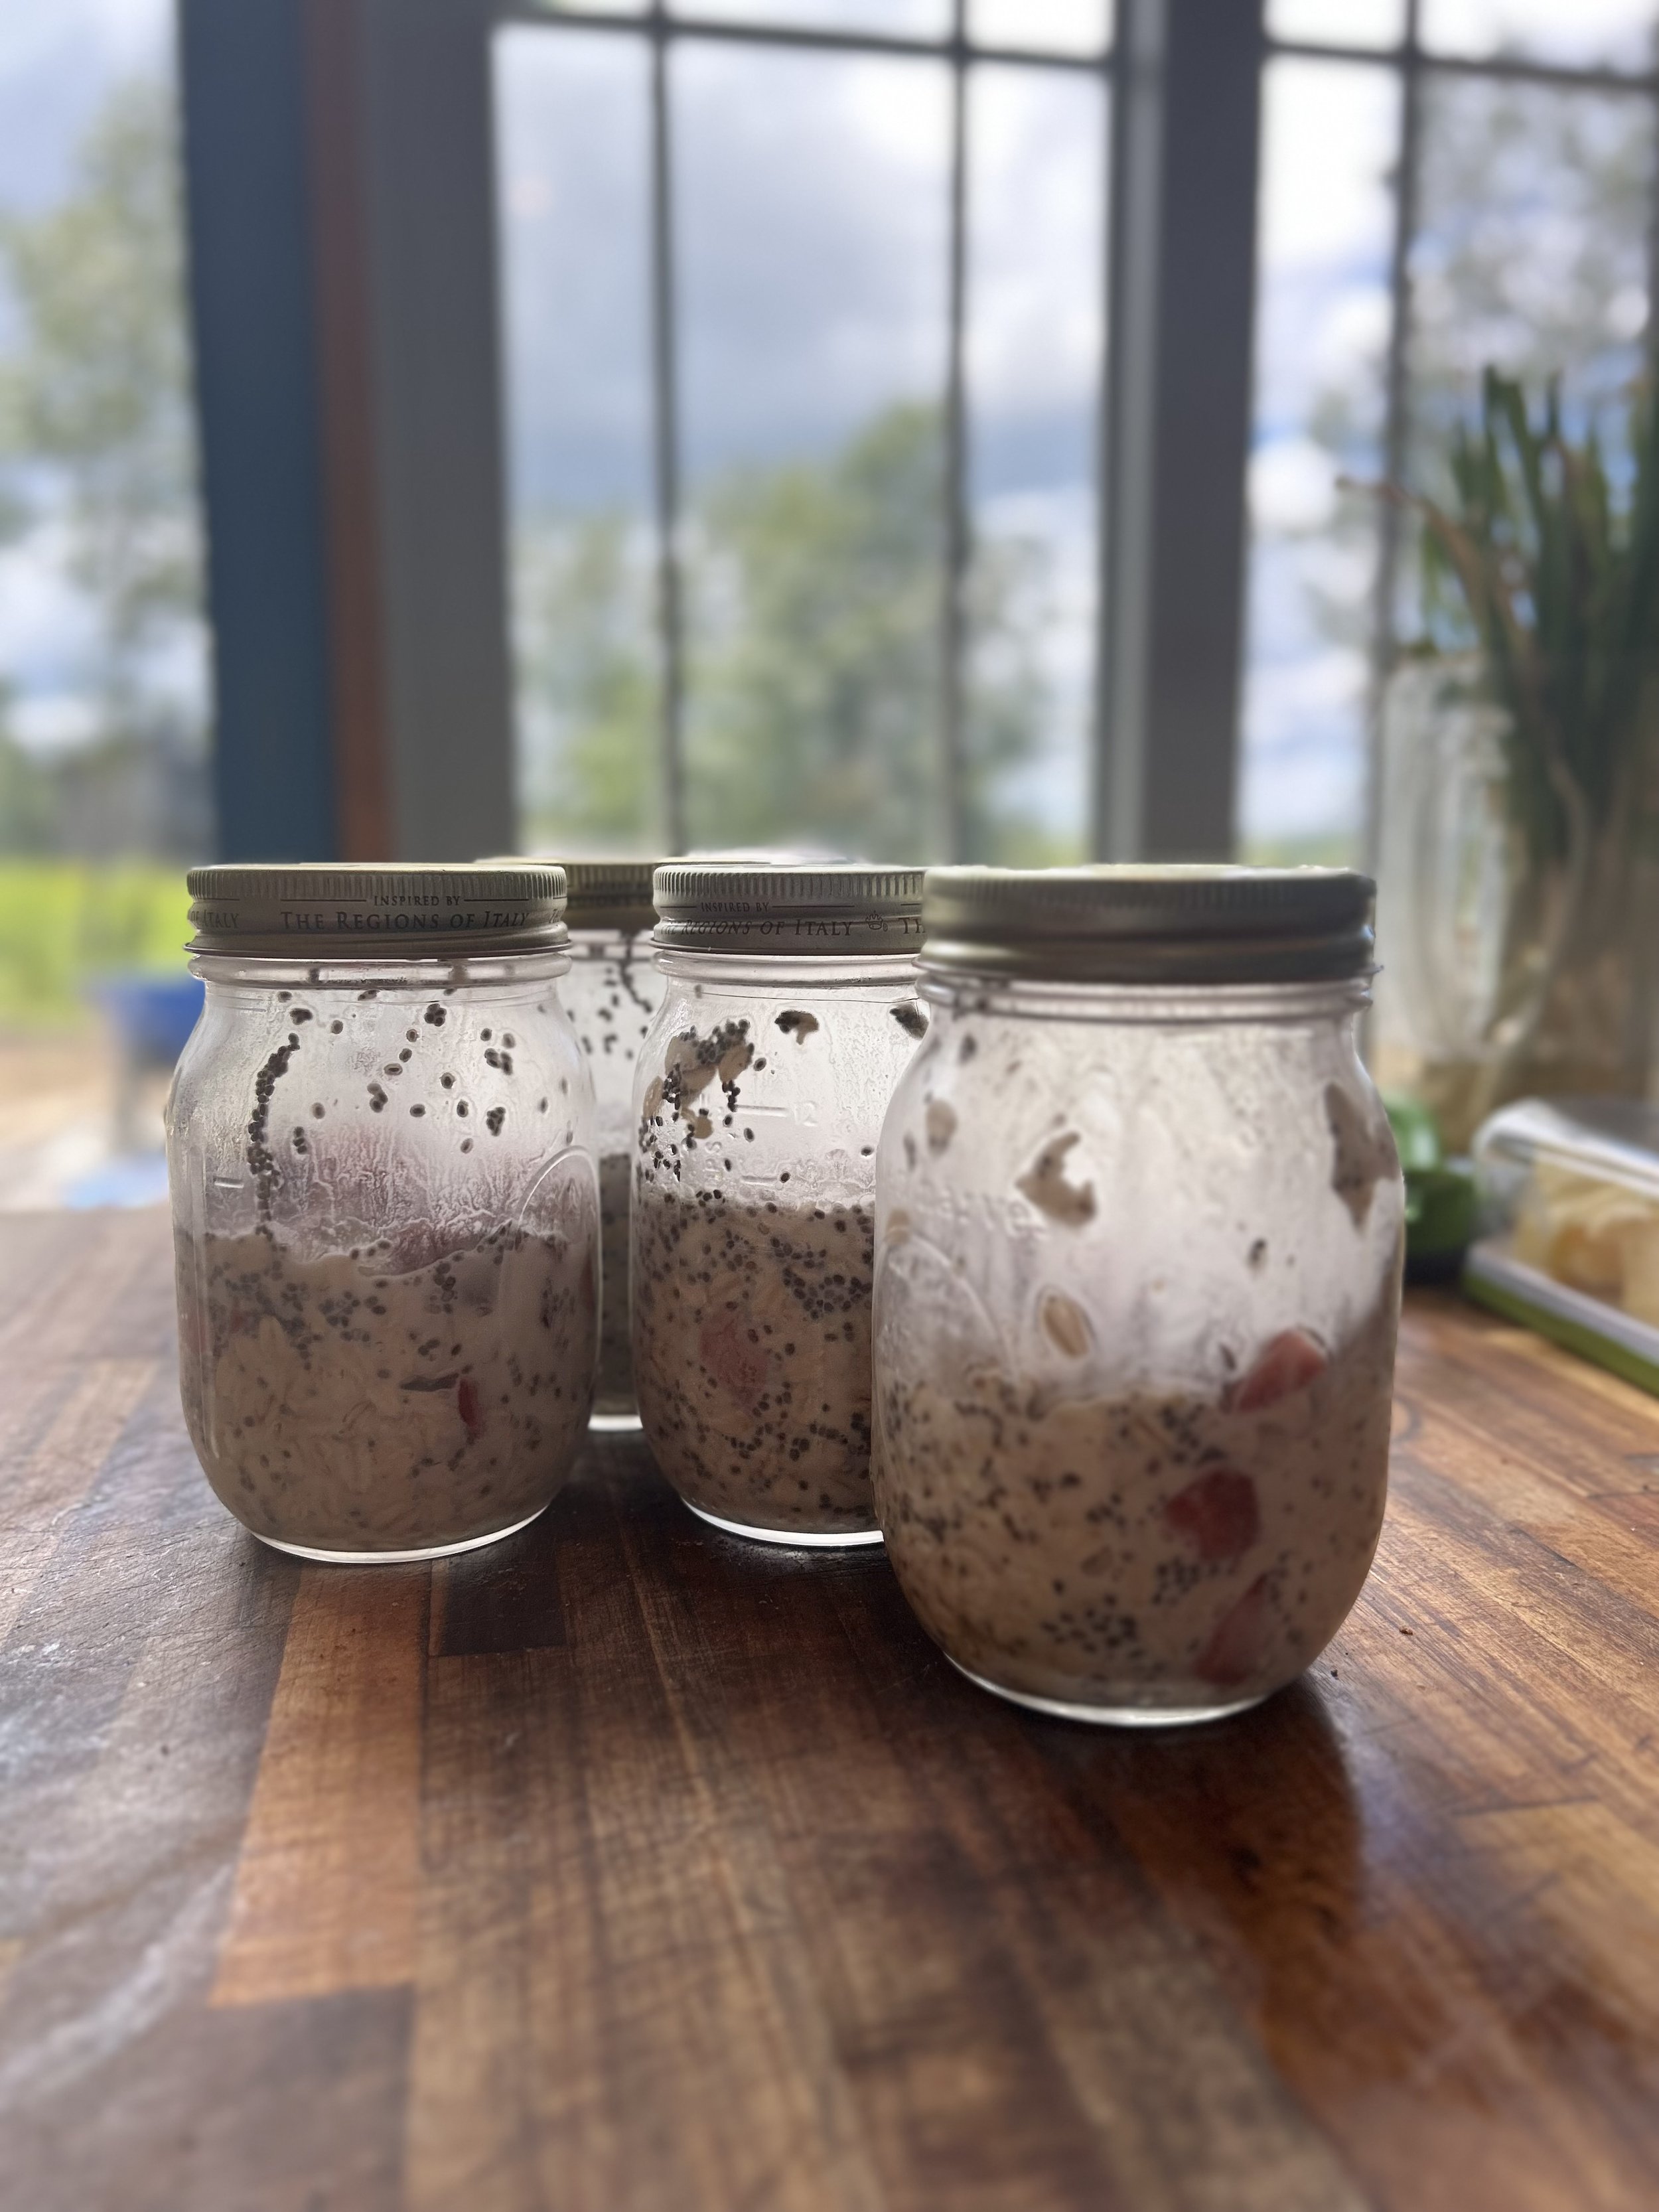
I’m always looking for a yummy, healthy, FAST breakfast option. Most of the time, I end up shoving down some sourdough toast, smeared with a little butter. This recipe is so simple, even I, the queen of “I don’t want a recipe, they take too long to read”, will actually make. And they taste so good, I couldn’t even wait overnight. I made it about 2hrs…..

This recipe is also great because it helps use up that last little bit of milk and either yogurt or kefir. Or those last few berries, or whatever your favorite fruit may be.

Fruity overnight oat meal prep
Ingredients (This is PER JAR)

3/4-1 cup oats (I like steel cut because I prefer a firmer oat texture)

1tbsp chia seeds

1/4 cup kefir or yogurt

1/2-1tbsp honey (to your taste. optional: substitute maple syrup)

About 1/2 cup of milk

about 1/3 cup of fruit

4 jars (I used pint sized to allow the oats and chia seeds room to expand)

Instructions
1. Add dry ingredients to each jar.

2.Add wet ingredients.
3. Add fruit of choice (I love strawberries and raspberries so those usually make an appearance in mine)
4. place lid on each jar, shake jars to roughly combine.

5. Place jars in fridge and store overnight…..or eat them as a snack in 2hrs…. :)

THAT’S IT. 6 ingredients, 5 steps and you have breakfast for like the whole week. I like to make them before bed (I also make my cold brew coffee at this time!) so I can wake up and not have to think. Just grab my jar and GO!

Why Orchard House?

I don’t know about you, but personally, I always wonder where folks come up with the lovely, cute, creative names for their farms. I realized I’ve never shared how our farm name came about. Since this is my blog and I have some time, I’ll share the long version and go all the way back to my childhood.

When I was little, my mother had a set of books that she kept on our bookshelf in our living room. I always liked looking at the books even though I didn’t know what they were. I have quite a soft spot in my heart for old, beautiful hardcover books and would frequently go to our library as a child and spend my allowance to buy hardcover books that I just thought were pretty and (again, being completely honest) smelled good. (My husband tells me I have a super sniffer. One of the things I love about books is how they smell)

Okay. I came to find out, when I was older and could read, the lovely green and tan books on the living room shelf were the works of the author Louisa May Alcott. I believe the first time I read her works were these copies of the books. I loved them. I don’t remember how old I was. I don’t think I was maybe 12-15…Not just Little Women, though I do love that series. I really love all of her works. My favorite story of hers is actually a solo novel called Jack and Jill. Followed secondly by the duology of Eight Cousins and Rose in Bloom. But as I said I do deeply love all her works.

Fastforward to after college and I’m starting my handweaving studio and business at the same time I’m starting a raw milk dairy and grass fed beef business. (We don’t do anything half-@$$ed in the Bleasdale household…) I started contemplating names. I wanted it to have significance to me, even if no one else ever understood it or liked it. I decided on Orchard House Studios. At the time, we lived in a little house that was formerly a workshop that Ben built when he was 18. The physical location of the building on the farm was next to the orchard. (which is no more. The space is now used as the garden and almost all the fruit trees that were planted are gone)

So my studio was next to the orchard and in my home, Orchard House. If you’ve ever read the Lousia May Alcott books, specifically the Little Women trilogy, you might remember that Alcott named the house that the March family inhabits the Orchard House. There are several other wonderfully named homes in the series: Dove Cottage, Plumfield, etc. I love the old world custom of naming homes. But that’s a whole ‘other conversation.

When the farm began to grow more and more and we needed a distinction between the goat farm and the cow farm and my weaving business was diminished to an extent, I simply chose to carry on the name that I loved so much and call our farm Orchard House Creamery. My father-in-law told me it was a terrible name for a farm. He said it doesn’t have anything to do with dairy and didn’t make sense. It wouldn’t make people think of milk. hahaha. It’s funny to remember that now.

it’s funny, we no longer live in that house, the orchard is no longer there, but the name and the meaning and the literary reference remain. I felt somewhat like a silly little girl naming my farm for a reference to a book…but I stick by it because it brings me so much joy every time I think of it. It reminds me of a particular scene in the series which I dearly love: the children are out-of-doors playing and come to lie down on their backs and talk about their hopes and dreams for their lives. They called it building castles in the sky. I love that picture of daydreamy hopes for the future and it’s another reason why I chose the name I did.

A complete side note because I’m feeling nostalgic…I was going through some boxes of stuff from when I was a kid a few years ago. I discovered a copy of the book Eight Cousins that was gifted to me at some point though I don’t remember receiving it. My family (like many others I’m sure) has a tradition of writing the date and name of whom gifted the book to whom. I happened to look inside and found that my grandmother gave me that copy of Eight Cousins when I was a little girl. My grandmother passed away a few years ago. It’s amazing how things become precious to us after loved ones passed away. I love thinking about grandma gifting this book to me. She always encouraged us to read and loved to read, herself. I miss her but am so thankful for helping to instill love of literature in me.

And that, dear readers, is the incredibly long version of how our farm got its name.
~JoAnna

Grass fed beef - Philly cheese calzones

Grass fed beef philly cheese calzones

INGREDIENTS (For beef mixture only, see pizza crust recipe for a from scratch dough or use a pre-made dough)

1lb round steak (or sirloin works great for this recipe too!)

1 medium onion (chopped)

1 bell pepper (chopped)

4-5 button mushrooms

4 slices of Swiss cheese (or your other favorite variety)

1tbsp minced garlic or 2-3 garlic cloves

salt and pepper to taste

Splash of red or white cooking wine

This pizza crust is the one I make. It's super easy and if you make it first, you can let it rise while you make your beef mixture.

https://pin.it/5xqu3hD

Pre-heat oven to 350.

Slice the round steak into either long slices or bite size pieces. Sauté onion (by itself to get it cooked and caramelized a little first), once onion is translucent, splash with wine to deglaze pan and add a little extra kick of flavor.  then add mushrooms, bell pepper and then finally the steak. Season all with salt, pepper, garlic. Sauté beef just until it just barely turns brown cause you’re gonna be cooking it again in the oven and you don’t want it to get tough. 

Roll your crust out in kind of a rectangle, place it on a baking sheet. 

Scoop sautéd mixture into dough, place slices of Swiss cheese (or whatever kind you prefer) and fold up the sides to the mixture is completely covered over. Bake at 350 until crust is golden brown on top.

**Optional: you can brush the outside of the dough with melted butter and a little more garlic to give it another little kick of flavor.

Grass fed beef bacon!

Beef bacon. My mouth is watering just looking at it.

Beef bacon. My mouth is watering just looking at it.

Y’all…If you know me at all, you’ll know I have a bit of an obsession with bacon. Seriously. Is there actually a better food?

You should also ask my mother-in-law about it sometime at market. Ask her about JoAnna and bacon and the first time she made BLTs when Ben and I were dating. lol. Fun times.

Okay. But today, we have something NEW. Something DIFFERENT. But its seriously just as good. WHAT?? It’s bacon from a COW. Yeah. That blew my mind.
It started when I was on Instagram a few years ago. A customer posted a picture of some beef bacon she had cooked up for her family. I think I messaged her within about a minute of reading the post. I HAD to know more.

Fast forward to the next time I go to the processor with a cow, “Hey do you guys do you guys do beef bacon?” I got the WEIRDEST stare that said without words, “You know bacon comes from pigs, right lady?!” Yeah…..I didn’t ask again after that.

I’ve since found a different processor in addition to my first that WAS able to cut beef bacon for me. And let me tell you, it’s delicious. It isn’t like your traditional bacon. It isn’t even like uncured bacon that I’ve had. It’s thicker, chewier and has a different flavor, while being similar in some respects.

Here’s how to cook it:
INGREDIENTS
1lb grass fed beef bacon
salt
pepper
SMOKED paprika

Generously season bacon with salt, pepper and smoked paprika (The smoked paprika is the key to giving it that delicious bacon-y flavor)
In a large skillet, over medium/med high heat, place your seasoned strips of bacon. Cook until bacon has shrunk up, has good caramelization and good color, about 5min per side. Work in batches if necessary. 
SAVE DAT FAT. My favorite is to use it to cook onions when I'm making BLTs. Yup. I make BLOTs instead. Try it. You'll never be able to eat a BLT without the O again. 

Recipe Idea: Panara cream of chicken soup recipe copycat

VmSHFQxXJn2jzT39LYnsGp_yTiWCNIhYWYOqz80N6AYnM8wqohAdyDq_oTuVY4y2LvtretknAa0-il1ULJBpsmOfQb8TacYLhKIBRn_xzzDpoEF4B8n_KPoKXETxhOqrEB8y8bQfKsOamN_zQASNh2hJUIMRKdnXUHs=s0-d-e1-ft.jpg

It’s raining again. Around this time of year, I get really tired of cold and wet. (Not to mention MUD) so I am usually looking for some kind of comfort food. This one is just about perfect. We had it first at friends’ house and I BEGGED for the recipe because it was SO good! I won’t take credit for creating the recipe myself (You can see the original recipe from the source link below). As usual, I tweak things here and there to fit our taste preferences. For example, I use two boxes of long grain and wild rice (Rice a Roni brand) instead of just one, I always add extra veggies (more carrots and celery) and three chicken breasts instead of two. I add a lot more seasonings because we like a nice full flavored soup. I cook the chicken breasts in my IP first. Initially, I did this because I didn’t have enough chicken stock to make the soup and I needed more and if you cook chicken breasts in the IP, it’s a quick, easy, cheater trick to get a couple of cups of stock fast. ;) I also (OF COURSE!) use our delicious raw milk (or cream if we have it) since it’s the equivalent of “light cream” anyway. ;)
Anyway, this recipe is awesome and I’m so glad we’ve added it to our regular meals. I make this at least a couple of times a month. (It could easily be frozen, but usually we just eat it for several meals and I stretch it by adding more cream or milk and a little more salt/pepper. Give it a try, it comes together pretty quick and it’s so warm and comforting!

Panara Cream of Chicken Soup Copycat


Recipe source here.

INGREDIENTS

  • 6 cups chicken broth

  • 2 chicken breast halves (cooked, boneless and cubed)

  • 1 (6 ounce) package long grain and wild rice blend, quick cooking version (I used Rice a Roni Long Grain and Wild Rice. If you'd prefer not to use the seasoning mix/box mix you can season to your own taste. I'd probably just add a couple of TBSP of flour, parsley, salt and pepper)

  • 1⁄2 teaspoon ground black pepper (We are pepper people and I added more than this)

  • 1⁄2 cup all-purpose flour (I believe I added a little extra. I make roux sauce a lot so I just adjust as I see fit.)

  • 3⁄4 cup butter (12 tbsp. or a stick and a half) Yes, really. It's a lot of butter but the veggies absorb a lot and you have to have enough in the pot to actually make the roux.

  • 1 cup carrot, diced

  • 1 cup celery, diced

  • 1 cup onion, diced

  • 3 cups light cream ( I just used our milk. It thickens up beautifully!! )

DIRECTIONS

  • Open rice, pull out seasoning packet and set aside.

  • In a small bowl, combine pepper and flour. Set aside.

  • In a large pot over medium heat, combine broth and chicken. Bring to a boil, then stir in rice. Cover and remove from heat.

  • In a medium saucepan over medium heat, melt butter. Add carrots, celery and onion and saute for 5 minutes. Stir in contents of seasoning packet, and continue cooking vegetables until softened, about 5 minutes more. Add seasoned flour gradually while constantly stirring, to form a roux. Saute roux for 3-4 minutes to cook out raw flour taste.

  • Whisk in cream, a little at a time, until fully incorporated and smooth. Cook until thickened, 5 minutes.

  • Stir cream mixture into broth and rice. Cook over medium heat until heated through and rice is done,15-20 minutes.

  • Alternatively, for those who cannot get the quick-cooking version of the rice, I have put the broth on to boil and cooked the 25-minute version of long grain and wild rice blend according to the directions, while sauteeing the veggies in the butter. I tend to cook the veggies longer this way, and I like them quite soft. I then follow the rest of the directions above, adding the rice/broth to the cream mixture. I've also used fat-free half and half with no appreciable difference in flavor. Enjoy!

This kind of recipe tends to intimidate me. It seems like a lot of stuff to read and a bunch of steps but it's really quite simple. Dice and onion, dice 2 carrots, dice 2 sticks of celery, sautee and make a roux while you heat some chicken and chicken broth. You could probably use leftover chicken, I threw a couple breasts in my instant pot while I diced up my veggies. The whole thing takes about an hour and most of that is really just stirring soup in a pot. The only word of caution I would give is don't let your rice stick to the bottom of the pan. I got to the last step of letting simmer for 15min or so and I decided I could go do other things for a bit....Nope. Forgot about rice. Miraculously, it still turned out fine! But still. Don't do that.

What makes grass fed beef good or bad?

I hear people frequently talk about grass fed beef and how “gamey” it is. This frankly confuses me to an extent because this has never been an issue with our beef. I’ve never had a batch of our beef come out game-y but it got me thinking, what do we do to prevent that flavor from coming out?

There are a lot of factors that contribute to flavor of beef. Age of the cow, gender (bull or cow and steer vs bull as well), conditions of the actual slaughter house/how the animal is butchered, hang time, how/what they are fed, how they are treated during life, etc.

Older cows honestly taste better in my opinion. The beef is literally “aged”. (Think aged cheese. Much richer flavor) I actually heard/read somewhere recently that chefs for upscale restaurants are looking to get beef from older cows because the meat tastes sooo much better and richer.

Gender matters and whether it’s a bull or a steer (fixed bull). Bull meat CAN be more game-y because of the testosterone still in the system of the animal. Doesn’t always make a difference, sometimes it does. Unfortunately, breed also plays into this. We had an angus bull (beef breed) processed and the meat was sweet and rich and not gamey in the slightest. We had a milking short horn (dairy breed) bull butchered, totally different flavor. A little more gamey than the angus, but still not enough to be off-putting.

If the animal is not treated well or eats substandard grasses or hay, it may come out gamey. If the animal doesn’t have a good place to rest or is constantly fighting for food or dealing with other stresses, it will taste gamey. If the animal does not have easy access to good water (whether that be pond/stream or human-provided water source), it will cause the meat to be gamey and tough.
Feeding, I think, probably is biggest factor. You can’t just throw a cow out there and hope the grass it has is enough. You honestly can’t even buy just any ol’ hay and feed them that. You need to control what they are eating at all times in order for the meat to come out tasting good. We always ensure that our beef cows (and our dairy cows too, of course!) have access to good quality hay, highly nutritious grasses, legumes, etc. and a good variety within their pastures. This helps ensure the beef from those cows will taste the absolute best!

If the animal is stressed immediately proceeding the actual slaughter, adrenaline will rush into their system and ruin the meat. It will be tough and gamey. If the slaughter house conditions are substandard, this causes stress which causes gamey flavor. How the animals are handled at the processor is very important. The processor we have selected is the best we’ve found. They don’t use a shock stick, don’t yell or whack the animals, they’re calm and gently move the animals into the pens.

Hang time also effects flavor. Warning: if you’re unfamiliar with the process of butchering, this may seem graphic. When an animal is processed, the first step is the actual killing. The blood is drained, the organs are removed (and in some cases like ours, saved to be packaged up later) , the skin is removed as well as anything else that is not the actual “meat” of the animal. This is called the carcass of the animal and it is left to hang in the cold storage for an amount of time. Pigs for example usually hang for about 3-4 days. They don’t really require much longer than that. Beef needs to hang for quite a bit longer in order for the beef to get good and tender. Yep, that’s what this step does: makes the meat tender. We never hang our beef for less than 12 days. I’d prefer 21 days but it’s hard to get a processor to hang it this long cause they gotta make room for more product. Once the hanging is done, the meat is cut into the cuts selected (such as roasts, steaks and ground meat, etc.) It’s packaged and ready for pick up!

There are probably more factors that I am not thinking of at the moment that contribute, but these are the basics of what makes grass fed beef good or bad. You should always feel completely comfortable asking the local farmer you intend to purchase from about any of these things. I know I personally am always happy to answer any questions that folks have and if I don’t know the answer, I’m happy to find out!
~JoAnna

Dark brown sugar is taking over

We try to stay healthy around here, we try to eat healthy around here. NOTE: THIS POST IS NOT ABOUT HEALTH AND IS NOT DIRECTLY RELATED TO RAW MILK. One of the other important factors of raw milk (and any food in general) is good flavor and a pleasant taste. To be completely honest, this is one of the main reasons I love raw milk: the flavor. It just tastes SO much better than pasteurized milk.

But what, pray tell, am I talking about with dark brown sugar? Confession: I never before thought about substituting anything for my normal, white sugar. It just never crossed my mind. It wasn’t that I didn’t think you could (or maybe I did think that…? I don’t know now) but I just never did.

Rewind to about 2 months ago. I’m baking cookies. Peanut butter cookies to be exact. We love peanut butter cookies but generally, they are almost too sweet. I think it’s probably because peanut butter is fairly sweet on its own. The recipe I use calls for half a cup of brown sugar and half a cup of white sugar. I had just been to our local mennonite grocery store (we shop there often cause we live in the boondocks and it’s the closest grocery store to us. 5 min as opposed to 35 min) Anyway, I was out of “regular” brown sugar (aka: light brown) and decided to try dark brown sugar instead. In the last few years, I’ve discovered that I tend to like things that use molasses and that “dark” things tend to have a deeper, richer flavor. Dark brown sugar is no exception to the rule here. While mixing the dough for the cookies, I added my dark brown sugar first….And then it occurred to me, why don’t I just use brown sugar for the whole recipe? I like things to taste very flavorful. I like deep, rich flavor. What could it hurt? Well…it hurt my enjoyment of white sugar. The cookies came out amazing. The over-sweetness was completely gone and the cookies just tasted better.

After this positive experience, I decided to start substituting dark brown sugar whenever a recipe called for sugar. Tried it in cheesecake, cookies, asian cuisine, pudding, etc. it just seems to make everything taste better. AND there’s the added benefit that it isn’t bleached. But honestly, I mostly was just happy the flavor is so much better.

Just to add a little extra blurb, this is 100% true for honey as well. Our local mennonite grocery store carries honey from a local apiary that produces clover honey (traditional, light, tasty honey) as well as wild flower honey (very dark, thick and rich in flavor, but not overly sweet). I’ve also switched us to wild flower honey for the most part because I LOVE that dark, rich flavor.
So the next time you’re baking, try something bold and use all brown sugar. And give dark brown sugar a try too!
~JoAnna

Creamy and yellow, just like it should be - spring milk!

IMG_6396.JPG

It’s that magical time of year in the life of a dairy. The grass is finally here. FINALLY. The cows have been watching it daily, waiting for the moment when the farmer comes and releases them from their winter pasture/barn/hay and lets them onto that fresh spring grass. The sweet, tender, delicious stuff of dreams.

If you are already a customer of ours, you may have noticed a difference in your milk in the last few weeks. You may have noticed the milk is creamier. You may have noticed the milk is now more yellow in appearance.
That’s all due to the cows’ diet!

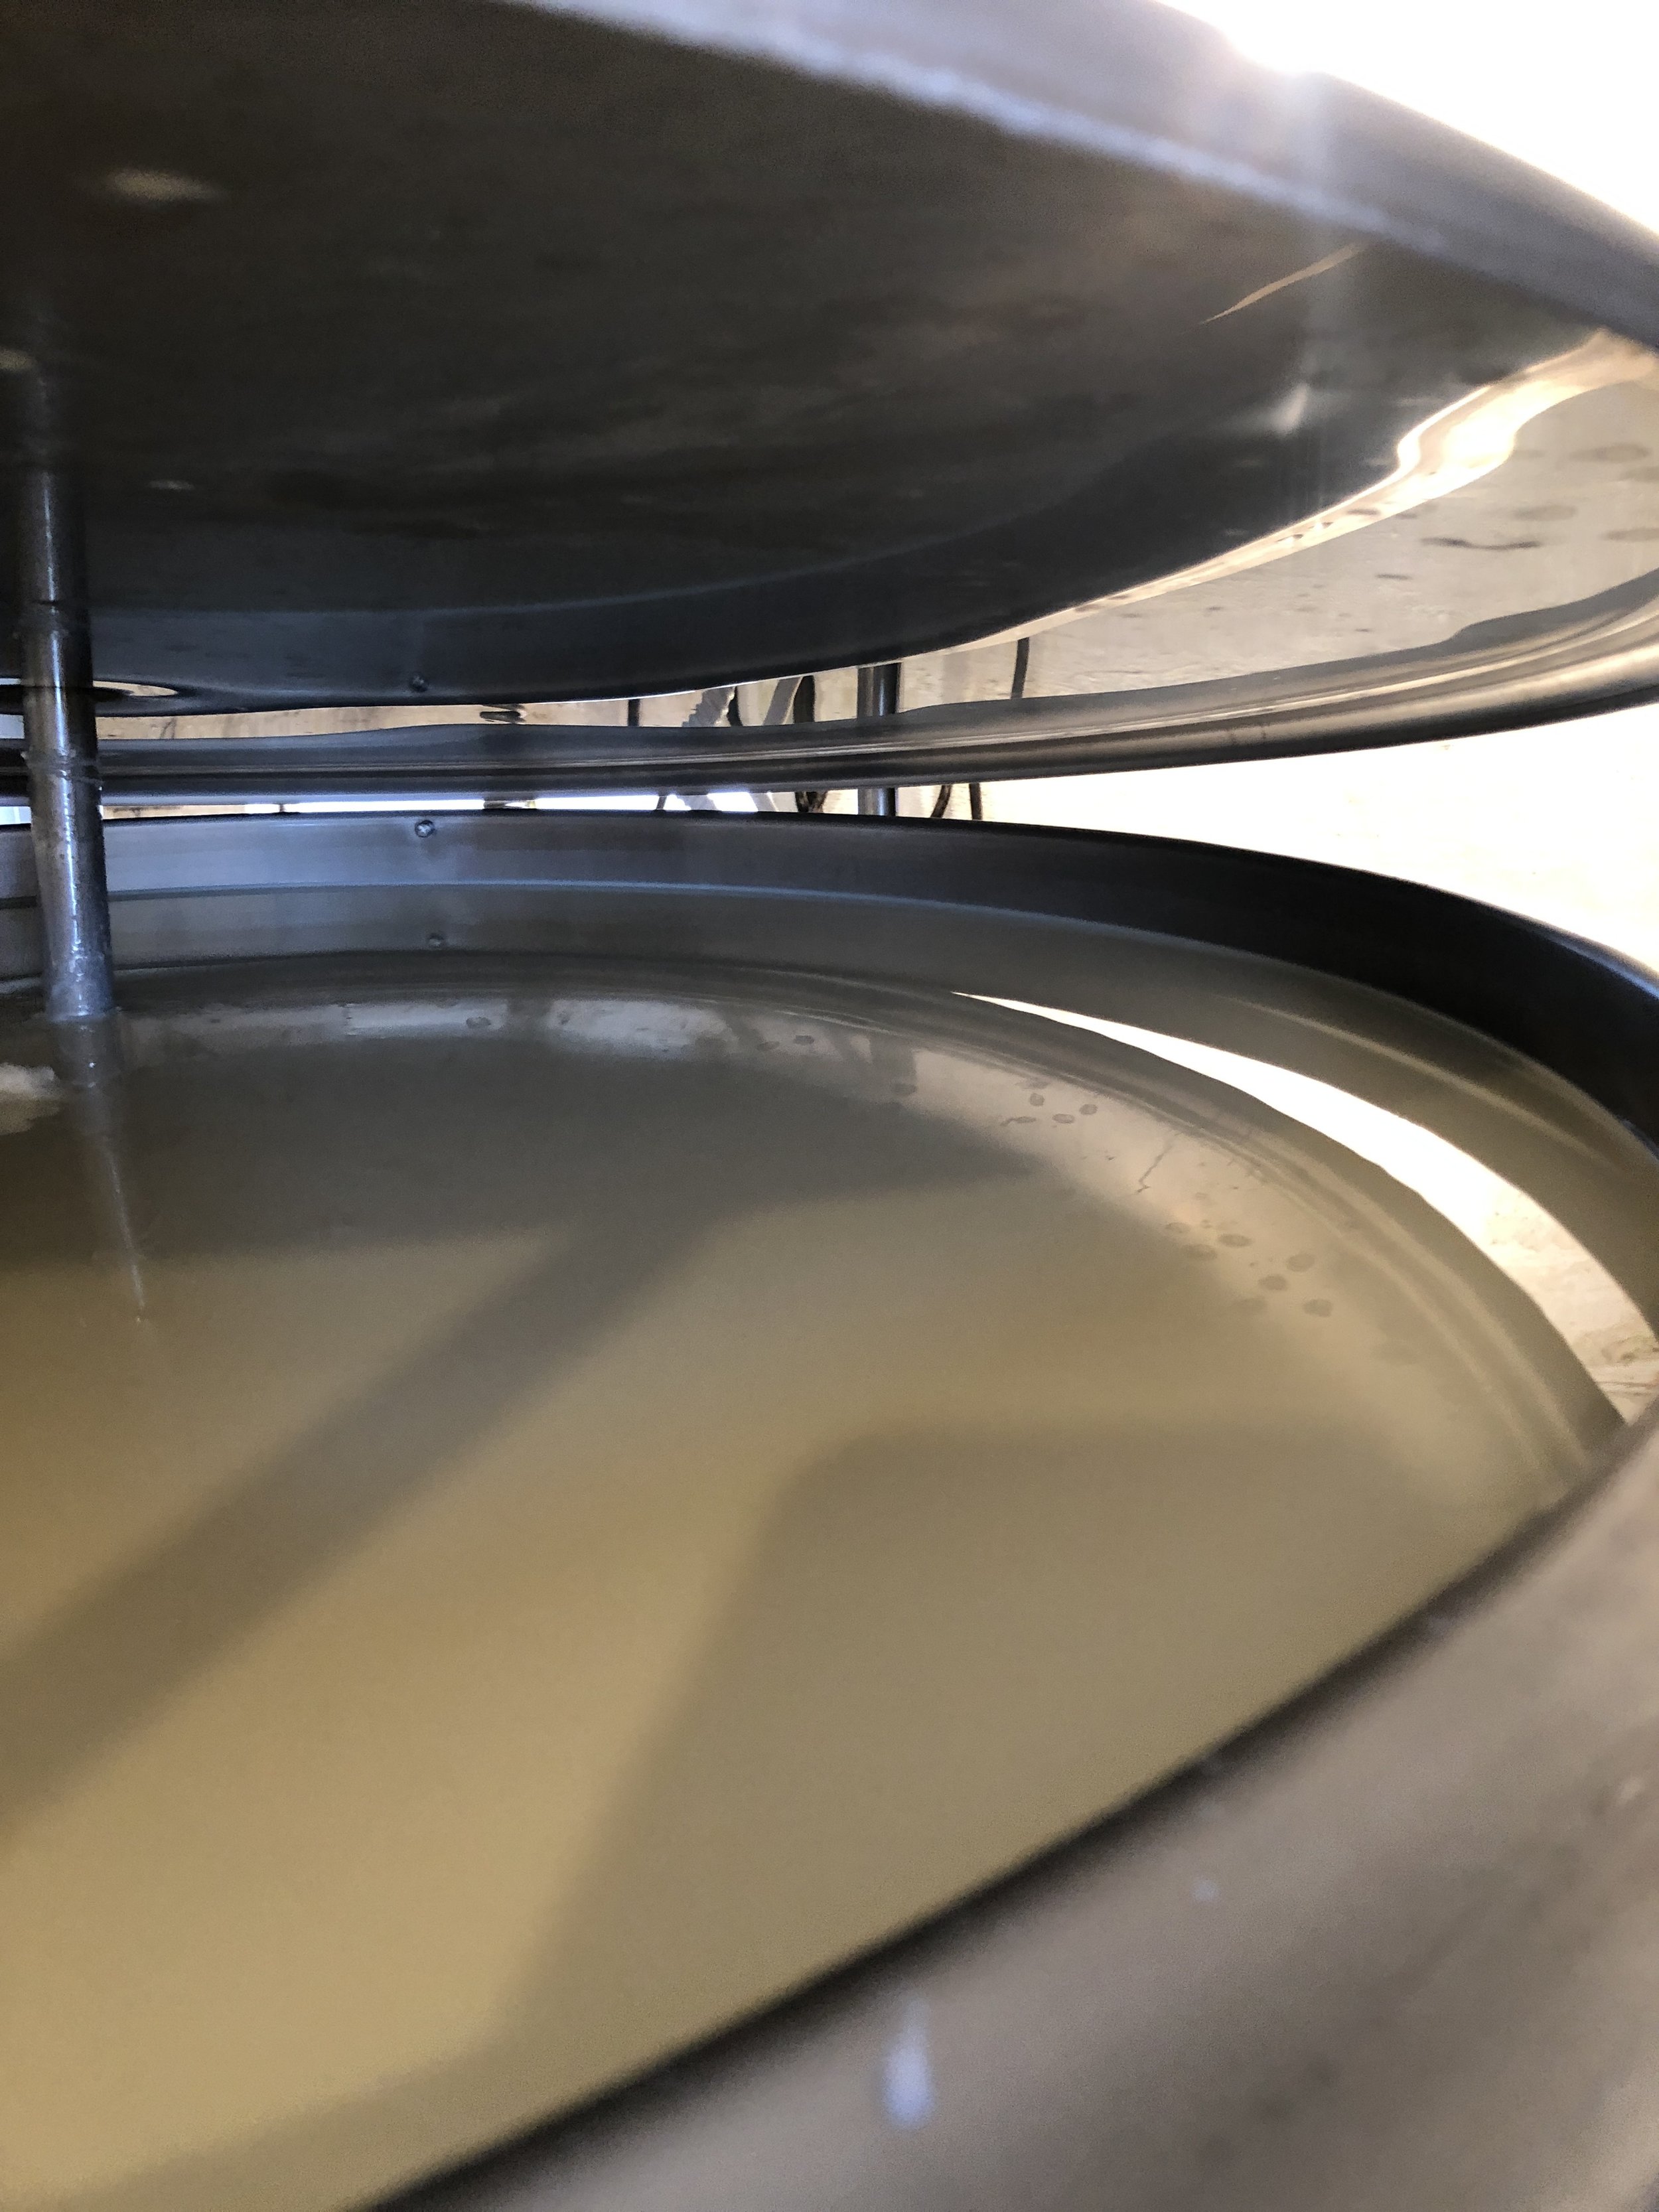
One of the reasons we took the plunge and switched to 100% grass fed was because it’s so much better for the cows. Cows need those long, grass (and hay!) fibers to keep their tummies operating correctly. (They need fiber just like we do!) The awesome part of grass fed cows, is it makes the milk so much better for you! I went to pour some milk for our 1 year old a few days ago and noticed as I grabbed the half gallon from the fridge that before I shook it, the cream line was nearly halfway down the half gallon. Our cows aren’t making milk…they’re making HALF AND HALF!! No cream skimming needed for coffee, just shake the milk and pour it right in! The cows are making so much milk right now due to the fresh spring grass! Just look at that bulk tank pictured above! Full to the brim! Now is the time for all your favorite dairy extras! Pudding, cheeses, butter (BTW: spring butter is YELLOW like you wouldn’t believe), yogurt, kefir, ice cream, I’m drooling just thinking about it all!

There are a few things that we, the farmers, have to watch for in the spring with the rich diet of delicious grass. First, we watch for a condition called grass tetany. When a cow’s magnesium levels are low, the fresh grass is often high in potassium and nitrogen which interferes with the cow’s ability to absorb and properly utilize magnesium. Thus, to ensure our cows stay healthy, we make sure we use a mineral supplement that is high in magnesium. This keeps the cows from getting “the shakes” or “the staggers” which is usually the first symptom of tetany. It looks like the cows are shivering!
We also have to watch that the delicate pH of their stomachs (called the rumen) stays in balance. How the heck do you do that?! It seems odd to humans, but we feed the cows free choice baking soda! (sodium bicarbonate) If a cows’ rumen becomes too acidic, they can end up with a condition called acidosis. Usually this is fatal so we make sure they have access to sodium bicarb at all times! But especially in the spring when their diet changes from hay to grass.

That’s just a little of the science that goes on behind the scenes of dairy. Keeping cows healthy in order to produce healthy, delicious milk requires a lot of work and knowledge! Before I was a farmer, I thought you just stuck cows in a field and they grew and made milk. I didn’t realize there were so many varieties of different grasses, legumes and grains. Did you know that some grasses produce prussic acid which is essentially cyanide and will kill cows if ingested and it’s below a certain height/growth stage?! I didn’t either before I was a farmer. But apparently that’s what Johnson grass is! (It’s also illegal to plant Johnson grass!)

It’s a lot to think about and watch for, but it’s all part of the job! And the results are so rewarding.
~JoAnna

Raw milk yogurt - or is it really sweet mana from heaven?

Y’all. I did it. I made yogurt for the first time. Okay, technically, this was the second time but I’m not counting the time that I made yogurt in my crockpot and forgot to double check the lid that had some residue on it from the last time I used it and the entire batch of yogurt tasted like chili….YUCK. Nope. Doesn’t count.

But seriously, I did it. (And yes, I did it in my Instant Pot) I feel like I’m on new plain of existence and like my whole life is about to change now.
My kiddos love yogurt. Erica could probably eat her weight in yogurt if I would let her. She’s also RIDICULOUSLY picky so convincing her that the new yogurt is really okay and not going to poison her may take a little doing. When I gave her a taste of my yogurt this morning, she said, “Oh it’s a different kind of yogurt?” And then got excited when I told her that I made this yogurt from our milk.

Here’s the link to the recipe I used. I did a couple of simple adjustments. She recommends ultra-pasteurized milk…giggle but this is a raw milk farm blog…So obviously, you can ignore that and use the milk you get from our farm. The other adjustment I made was I used store bought yogurt as a starter. She says you can do this but she uses a powdered starter. I didn’t have the presence of mind to have a nice powdered starter on hand so store bought yogurt it is. (I believe I used plain Greek yogurt from Aldi…I happened to be at that store at the time) I also reduced the culturing time to…9hrs, I believe. I did 9 because I was going out for the evening and set it for when I would get home. You could do a little as 8hrs or as much as 24. She said 24hrs removes the lactose from the milk…Since I am not lactose intolerant and love me some lactose, I didn’t want to culture that long.

The main thing you want to ensure when using store bought yogurt as your starter is that somewhere on the package it says “Contains Live, Active Cultures”. It also should be full fat yogurt. You only need a quarter of a cup to a half gallon of milk. But I’ve read a couple of different places that you can actually freeze yourself some starter to use in the next batch, just thaw it before you add it. Since I bought an entire tub of the store-bought yogurt, I will be freezing it to see if this trick works.

So I “messed up” the recipe. I didn’t allow the milk to fully boil on my “Yogurt/boil” setting on my IP. I somehow got confused and thought somewhere I read that you’re supposed to bring the milk up to 180 degrees and then cool to 110. (You regular yogurt makers probably know, but I didn’t remember). So that’s what I did. I shut it off when my thermometer read 180 and let it cool to 110. When it hit 110, I gently whisked in my 1/4 cup of starter and then put the pot back into the IP and pressed yogurt and set my timer. THAT’S IT.

Okay let’s talk about the yogurt itself for a minute. Holy. Cow. (Pun intended, of course!)
I decided to strain the yogurt overnight in the fridge because I like Greek yogurt the best. Nice and thick and rich. Mmmm.
Once it was strained, I put it in a quart mason jar (apparently, a half gallon of milk yields about a quart of yogurt when strained overnight) and put a lid on it. I decided to try some for breakfast this morning. I love strawberry yogurt. I didn’t have any fresh strawberries on hand so I opened a jar of my aunt’s homemade, prize winning strawberry jelly. Since jelly is rather…well…gel-like, I figured I should probably mix it in with a mixer. And because I’m lazy and don’t like to do anything by hand that I can stick in either my KitchenAid or use my immersion blender for. I opted for the whisk attachment on my immersion blender. Since I was only whipping up a half a cup of yogurt and about a tbsp of jelly, it just didn’t seem like i wanted the whole big mixer.
Okay, result? Yeah. It’s UNBELIEVABLY smooth, rich, flavorful and delicious. It’s basically like dessert for breakfast. It didn’t seem right that it could possibly ALSO be healthy for me. And yet, yogurt is full of probiotics that are fantastic for your gut. Especially when made from raw milk!! I can’t even believe that came out of my kitchen. I’m definitely going to be trying several other of my aunt’s homemade, prize winning jellies as mix-ins for my breakfast. (My all time favorite is her fig jelly. Drool.)

I’m picturing all the many ways I can use this delicious treat. Plain yogurt can be substituted for sour cream so maybe that’s ONE more thing I can eliminate from my shopping budget.

I’m also planning to make 2-ingredient dough using this stuff + self-rising flour. The plan is to make naan bread and pizza crust! Aaaaand maybe pretzel bites…with beer cheese… All our favorite treats. Though, I probably won’t attempt them all in one day….that could be carb overload.

Remember, if you don’t have an Instant Pot, you’re NOT barred from making fantastic, delicious, sweet-mana-from-heaven yogurt. You can also make it in your crock pot!

~JoAnna

The big move - Just in time!

For those of you that read our blog and live around the area, you know that we’ve had a little rain this winter…
Ben and I have both said again and again in the past 4 months since we moved the cows to their new farm, it could not have come at a better time. As they say, a picture is worth a thousand words. So let me show you what would have been and was is.

To give you a reference, this is what our pastures looked like over the weekend.

To give you a reference, this is what our pastures looked like over the weekend.

This is at our barn. The pasture where our cows would have been for the majority of the winter.

This is at our barn. The pasture where our cows would have been for the majority of the winter.

As you can see from the images above, the cows would have been pretty wet. We did have a barn for them to go in during inclement weather conditions, but it really was not large enough for all of them to be comfortable. Even though we have expanded the loafing area 3 times over the past 4 years. Some of the smaller cows probably would have been forced out of the barn and under trees instead. :(

Okay. So now I’ll show you what the cows currently have at their new farm:

Happy, dry, clean cows enjoying the large barn with fresh wood shavings.

Happy, dry, clean cows enjoying the large barn with fresh wood shavings.

The barn at the farm we are renting was built for 100+ cows. We have a mere 37 cows. So they have LOTS of space to spread out and stay dry and cozy when it rains or is yucky out. Their production speaks volumes for how comfortable they are. Their eating habits do as well! When cows are uncomfortable or stressed, they will not lay down during the day to chew their cud. Cud chewing is extremely important! The act of regurgitating their food is what actually feeds ruminents. Essentially, the hay/grass they eat feeds the bacteria in their stomach and the cud feeds the cow. If they don’t lay down to chew their cud, you know they are not happy. These girls, of course, all stood up when I came to take their picture! But were all happily laying down before I pulled the camera out.

The difference in facilities has taken a huge burden of stress off of us. While I still don’t like all the rain and the mud associated with it, this was the first winter since we started farming almost 8 years ago that I was not worried in the slightest about my cows. If it rained at night, I would wake up and think about how miserable my cows must be. Now when I hear rain at night, I can remind myself that my girls are happy in their dry barn. It’s really true: happy cows make more milk. And I can’t tell you how thankful I am that our cows are as happy as can be!

~JoAnna

5 ideas to use up leftover milk

This actually happens more frequently than people realize. Many of my customers will contact me and say “we just aren’t drinking the milk so I need to reduce.” I totally get that. One of the things that can be difficult for someone starting out with a raw milk herd share is how to effectively use most/all of their milk each week. Personally, our family drinks probably 5+ gallons per week. There are currently 4 of us in the house. My 15 month old goes through 2.5 gallons a week alone right now. My 4 year old would probably drink about the same if I would let her but she uses milk as an excuse to not eat the food I prepare for her. So her milk is now a reward for at least trying everything on her plate. (gotta mom smart, y’all) Depending on what I make for dinners and if we have chocolate syrup in the house, Ben and I can easily go through 2+ gallons between the two of us. (Dang! It’s a good thing we’re dairy farmers!)

Okay. So all that being said, if you have left over milk each week and just really don’t know what to do with it, here are some ideas:

  • Yogurt!
    lots of my customers make yogurt in their Instant Pots. I have not tried this yet, but I hear it’s real easy. You can also make it in the crock pot! <——this recipe I have tried with good results. Yogurt is a great option for adding a little extra probiotics to your diet. Sooo good for your tummy/gut health! Put it in smoothies, eat it with a little homemade jelly mixed in (or honey!), or use plain yogurt instead of sour cream in recipes and on tacos. (*Yogurt can be made using slightly sour milk. It will simply make the yogurt more tart)

  • Alfredo/white sauce
    This is a great option for using up milk. Simply make a white sauce! I make these for A LOT of different recipes. You could easily make a big batch and freeze it for later. They work well in potato soup, homemade mac and cheese, broccoli/cheese soup, pasta alfredo, etc. just to name a few.

  • “Sour milk” pancakes
    This one sounds weird. But we all know raw milk goes sour at some point. If you have milk that is too sour to drink left over, it actually makes delicious pancakes! (Think buttermilk pancakes.) Again, you can make a big batch and freeze.

  • Pudding
    You may think you’ve eaten pudding before. “It’s that stuff in the box, right?” No. That’s NOT pudding. Real pudding made from real milk is literally one of the most delicious concoctions that has ever been invented. Don’t worry, I’ve got a great pudding recipe. It’s easy, it uses 2.5-5 cups of milk and if you freeze it, it’s basically ice cream. (think frozen custard) I can’t wait that long. I eat it hot right off the stove. Super awesome when it’s cold outside and you want something warm to stick to your bones.

  • Farmer’s cheese
    This one is pretty simple as well. Farmer’s cheese can be so tasty on a variety of different things. Depending on if you add things into your farmer’s cheese, it could go on sweet or savory foods. Try this simple recipe. (recipe can easily be reduced)

So there you go! 5 awesome ideas to help you use up some of that leftover milk. (And stock your freezer for easy meals later!) You may find that you actually need to INCREASE your share if you use any of these!

Recipe: raw milk pudding

I have been meaning to share this recipe for a while! This is a favorite dessert of ours. You can use it as the base for making banana pudding or you can simply eat it plain. You’ll never go back to that box mix once you’ve tried this!

Raw milk pudding

*Note: We always make a double batch. It’s just too yummy!

Ingredients

2 ½ cups raw milk

½ cup of sugar (use brown sugar for butterscotch flavor)

Pinch of salt

1 egg

4 tbsp cornstarch

1 tbsp butter

1 tsp vanilla

*Optional: 2 heaping tbsp sweetened cocoa powder (for chocolate favor)


Directions

  1. Mix 2 cups of the milk, the sugar and the salt in a saucepan. Heat slowly.

     2. While the milk mixture is heating, beat the egg. Add to milk mixture, and to the scalding point, stirring constantly.

     3. Dissolve the cornstarch in the remaining ½ cup of milk, and add to the scalding milk, again, stirring constantly. Stir until thickened and remove from heat.

    4. Add the butter and vanilla.

    5. For flavored puddings, mix in the cocoa with the sugar before adding the milk, or substitute brown sugar for white sugar for a butterscotch flavor.

3 Amazing Benefits of Raw Milk

As my father-in-law likes to say, “Raw milk is good and good for you!” But what makes it good for you?

We’ve talked about what raw milk is and we’ve talked about is raw milk safe.

Now I want to talk a little more about why raw milk is good for you. I’ve mentioned before that raw milk contains natural enzymes.

These enzymes are what help your stomach break down the milk and digest it and process the protein chains of milk. They also help your body to absorb the calcium present in milk. (Did you know that when milk is pasteurized and those enzymes destroyed, your body doesn’t absorb the calcium contained in milk?!) On a personal note, I have found that when my stomach feels “churn-y”, drinking a glass of raw milk will help settle it, again, due to the enzymes.

Bacteria. It gets a bad rap. But did you know that exposure to bacteria is actually what makes your immune system strong? As a mom of two on a farm, there have been PLENTY of times when BOTH of our girls have EATEN DIRT. Again, as a mom, my general reaction is to TOTALLY FREAK OUT. Then you find yourself saying things like, “It’s probably good for them…” (Just wait. If you’re a first time mom…At some point in your life, you will very likely have a similar thought) Obviously, I don’t let my children go around eating handfuls of dirt. That would just be gross. And so gritty feeling. But I do know that my kiddos, growing up on a farm and drinking raw milk do not get sick very often. When they do, they are over it in just a few days, like it didn’t even touch them. The exposure to good bacteria really IS good for them. I’m not suggesting we don’t use basic hygienic practices at all, but when we live on antibacterial soap and purell hand sanitizer, we’re not only killing the bacteria that has potential to make us sick, but also the good bacteria that will make us strong. Same goes for milk. If you pasteurize it, you’re losing all that beneficial bacteria that will strengthen your immune system and keep you healthier.

Fun fact: Did you know that children that drink raw milk are less likely to get ear infections? Neither of my children (4 yrs and 10 months) have ever had an ear infection. Ever. And our family is not the only case. I have a dear customer that drank our milk for years that told me of her 6 children, the first was prone to ear infections (which was before raw milk) and the other 5 NEVER HAD EVEN ONE. Because after the first was when they started drinking raw milk.

Seasonal allergies. To be quite honest, I am not a sufferer of these. That being said, I have witnessed first hand the pure misery of seasonal allergies in 11 years of marriage to my husband. When we were in college, every fall and spring were full of watery, red eyes and constant sneezing. (Before we drank raw milk) It was horrible. Sometimes it would get so bad, he would hardly be able to breathe between sneezing fits. And yes, this man went on to be a farmer who is constantly exposed to grass, hay, and pollen outdoors. What keeps this at bay? Raw milk. Again. For the win. Raw milk actually helps prevent your body from having a histamine reaction to seasonal allergens. Kind of levels the playing field. When my husband is regularly drinking raw milk, you would never even know he had allergies. Seriously. The difference is night and day. This is again due to good bacteria within the raw milk.

Okay. This one isn’t a health benefit. But man, it’s quite the perk of drinking raw milk. Taste. There is absolutely no comparison. Raw milk tastes so rich and so creamy and so naturally sweet! It’s like you are drinking ice cream. Seriously. It. Is. So. Good. I suppose we could call this a health benefit because the delicious flavor will make you want to drink more and more of it. ;) Which enables you to get all the other wonderful health benefits!

~JoAnna Bleasdale

Raw milk - it's NOT pasteurized?! Is that SAFE?!

I think right after what is raw milk, the most common question we get is “Is raw milk safe to drink?”

Very simply put, yes.

But here’s the why behind the yes.

When pasteurization was invented, refrigeration did not exist. People were pretty much unaware of germs and what caused sickness. Hygiene was not really a thing. Neither were hygienic practices on dairy farms. (Google swill milk scandal sometime. YUCK. Poor cows! Imagine the milk that came from that!) It’s no wonder milk wasn’t safe to drink! What Louie Pasteur discovered was, put simply, if you boil the milk, it becomes clean and safe to drink. It kills the germs that can make you sick.

What Pasteur didn’t know what what else pasteurization kills. All milk contains natural enzymes that assist the body in digestion. When you pasteurize milk, you are cooking out those amazing enzymes which makes it very difficult for the body to break down. Especially because cow milk has longer protein chains that goat milk or human breast milk. That being said, cow milk can be easily digested by most of the general population if those enzymes are left intact.

The other “goodie” in raw milk is bacteria. Yep. The kind that helps to keep your immune system active, healthy and strong! Raw milk is a great way to combat a weak immune system and also fight against seasonal allergies! Pasteurization burns out all bacteria, including the beneficial stuff that actually fights against the germs and bad bacteria.

Okay. So what do we have now that makes raw milk safe?

  1. Refrigeration. When milk is cooled rapidly (from 102 to 38 degrees F within 20 min) it prevents germs from growing that could potentially make you sick.

  2. Enzymes. These babies, as discussed, make it so your stomach can easily digest cow milk. (Seriously. I can’t tell you how many of my customers are “lactose intolerant”)

  3. Bacteria. The kind that eats bad bacteria for breakfast and makes your immune system strong! (Literally, the good bacteria actually eats the bad!)

  4. Clean practices for keeping animals and cleaning equipment and animals properly.

This is just a basic run down. If you’re interested and looking for some REALLY good info on this, watch this video: https://articles.mercola.com/sites/articles/archive/2012/01/01/cdc-misrepresents-raw-milk-statistics.aspx

~JoAnna Bleasdale

Back to basics: What IS raw milk?

I think one of the questions we get most frequently from folks that have never tried raw milk, is simply: What IS raw milk? Most of our customers that own a herd share with our farm already know this but I know there are folks that may be just beginning their research into it.

The short answer, raw milk is milk in its most natural form. It has not had anything done to change it, besides being strained and cooled. What the heck does that do?! You might be thinking.

I usually feel it helps to also explain what pasteurized milk is. The pasteurization process was created to keep milk clean and keep people from getting sick. At the time, there was no refrigeration and thus, germs would simply multiply and make the milk really gross and cause the drinker to get ill with a variety of different diseases. Pasteurization is, essentially, boiling the milk at a very high temperature which burns out any bad germs that may be lurking in the milk. While this sounds great, you’re also losing two of the biggest benefits of the milk by boiling/pasteurizing it: good bacteria and natural enzymes.

So lets talk about these two main benefits and what they do for you. We’ll start with the good bacteria. Milk is a good environment for germs to grow. However, modern technology of bulk tanks allow us to cool milk to a temperature of 38 degrees (F) within about 20 minutes of milking the cows. Crazy! This effectively kills any germs or bad bacteria that may be lingering in the milk. The awesome part of leaving the bacteria in the milk is there’s also really good bacteria in the milk. These guys help to kill off any germs as well. The good bacteria will actually eat the bad! How cool is that?! And, bonus, when the good bacteria is taken into the body while drinking milk. it also works to strengthen your immune system which keeps you healthier. It even helps fight off seasonal allergies. Just ask my husband, Ben. He should probably never have been a farmer since he’s allergic to both certain grasses and calves…That’s kinda what cows and farming are about! That being said, when he’s regularly drinking our delicious raw milk, his allergies are virtually non-existent. Definitely don’t wanna burn that out!!

The second of the two main benefits of raw milk is probably my favorite: natural enzymes. These babies are truly amazing. I’m 32 and when I was growing up, not that many people were lactose intolerant. Of course there were some, but they were rather few and far between. Fast forward to now, and “dairy-free” is a thing and it’s everywhere. So many people are diagnosed as lactose intolerant. But did you know, this may not necessarily be true?! WHAT?! Yes. Remember how I said pasteurization burns out the natural enzymes in milk? Well those enzymes are what actually help the stomach to digest the milk. I have countless members of our herd share program that have been diagnosed as lactose intolerant and told they can’t drink milk or have dairy anymore. Personally, I would be DEPRESSED if I was told that. All that being said, my “lactose intolerant” customers can drink our milk because of the amazing natural enzymes! Their bodies don’t reject the milk because the enzymes break up those long protein chains that are sometimes harder to digest. I’ve actually found that almost nothing settles my tummy better than drinking a glass of raw milk.

So there we are! This tells you just a little about raw milk and why it’s delicious and SO good for you! Good bacteria that strengthens your immune system and natural enzymes that help even the more sensitive of stomachs to digest it! How cool is that!

~JoAnna B.

Why are your cows so skinny?!

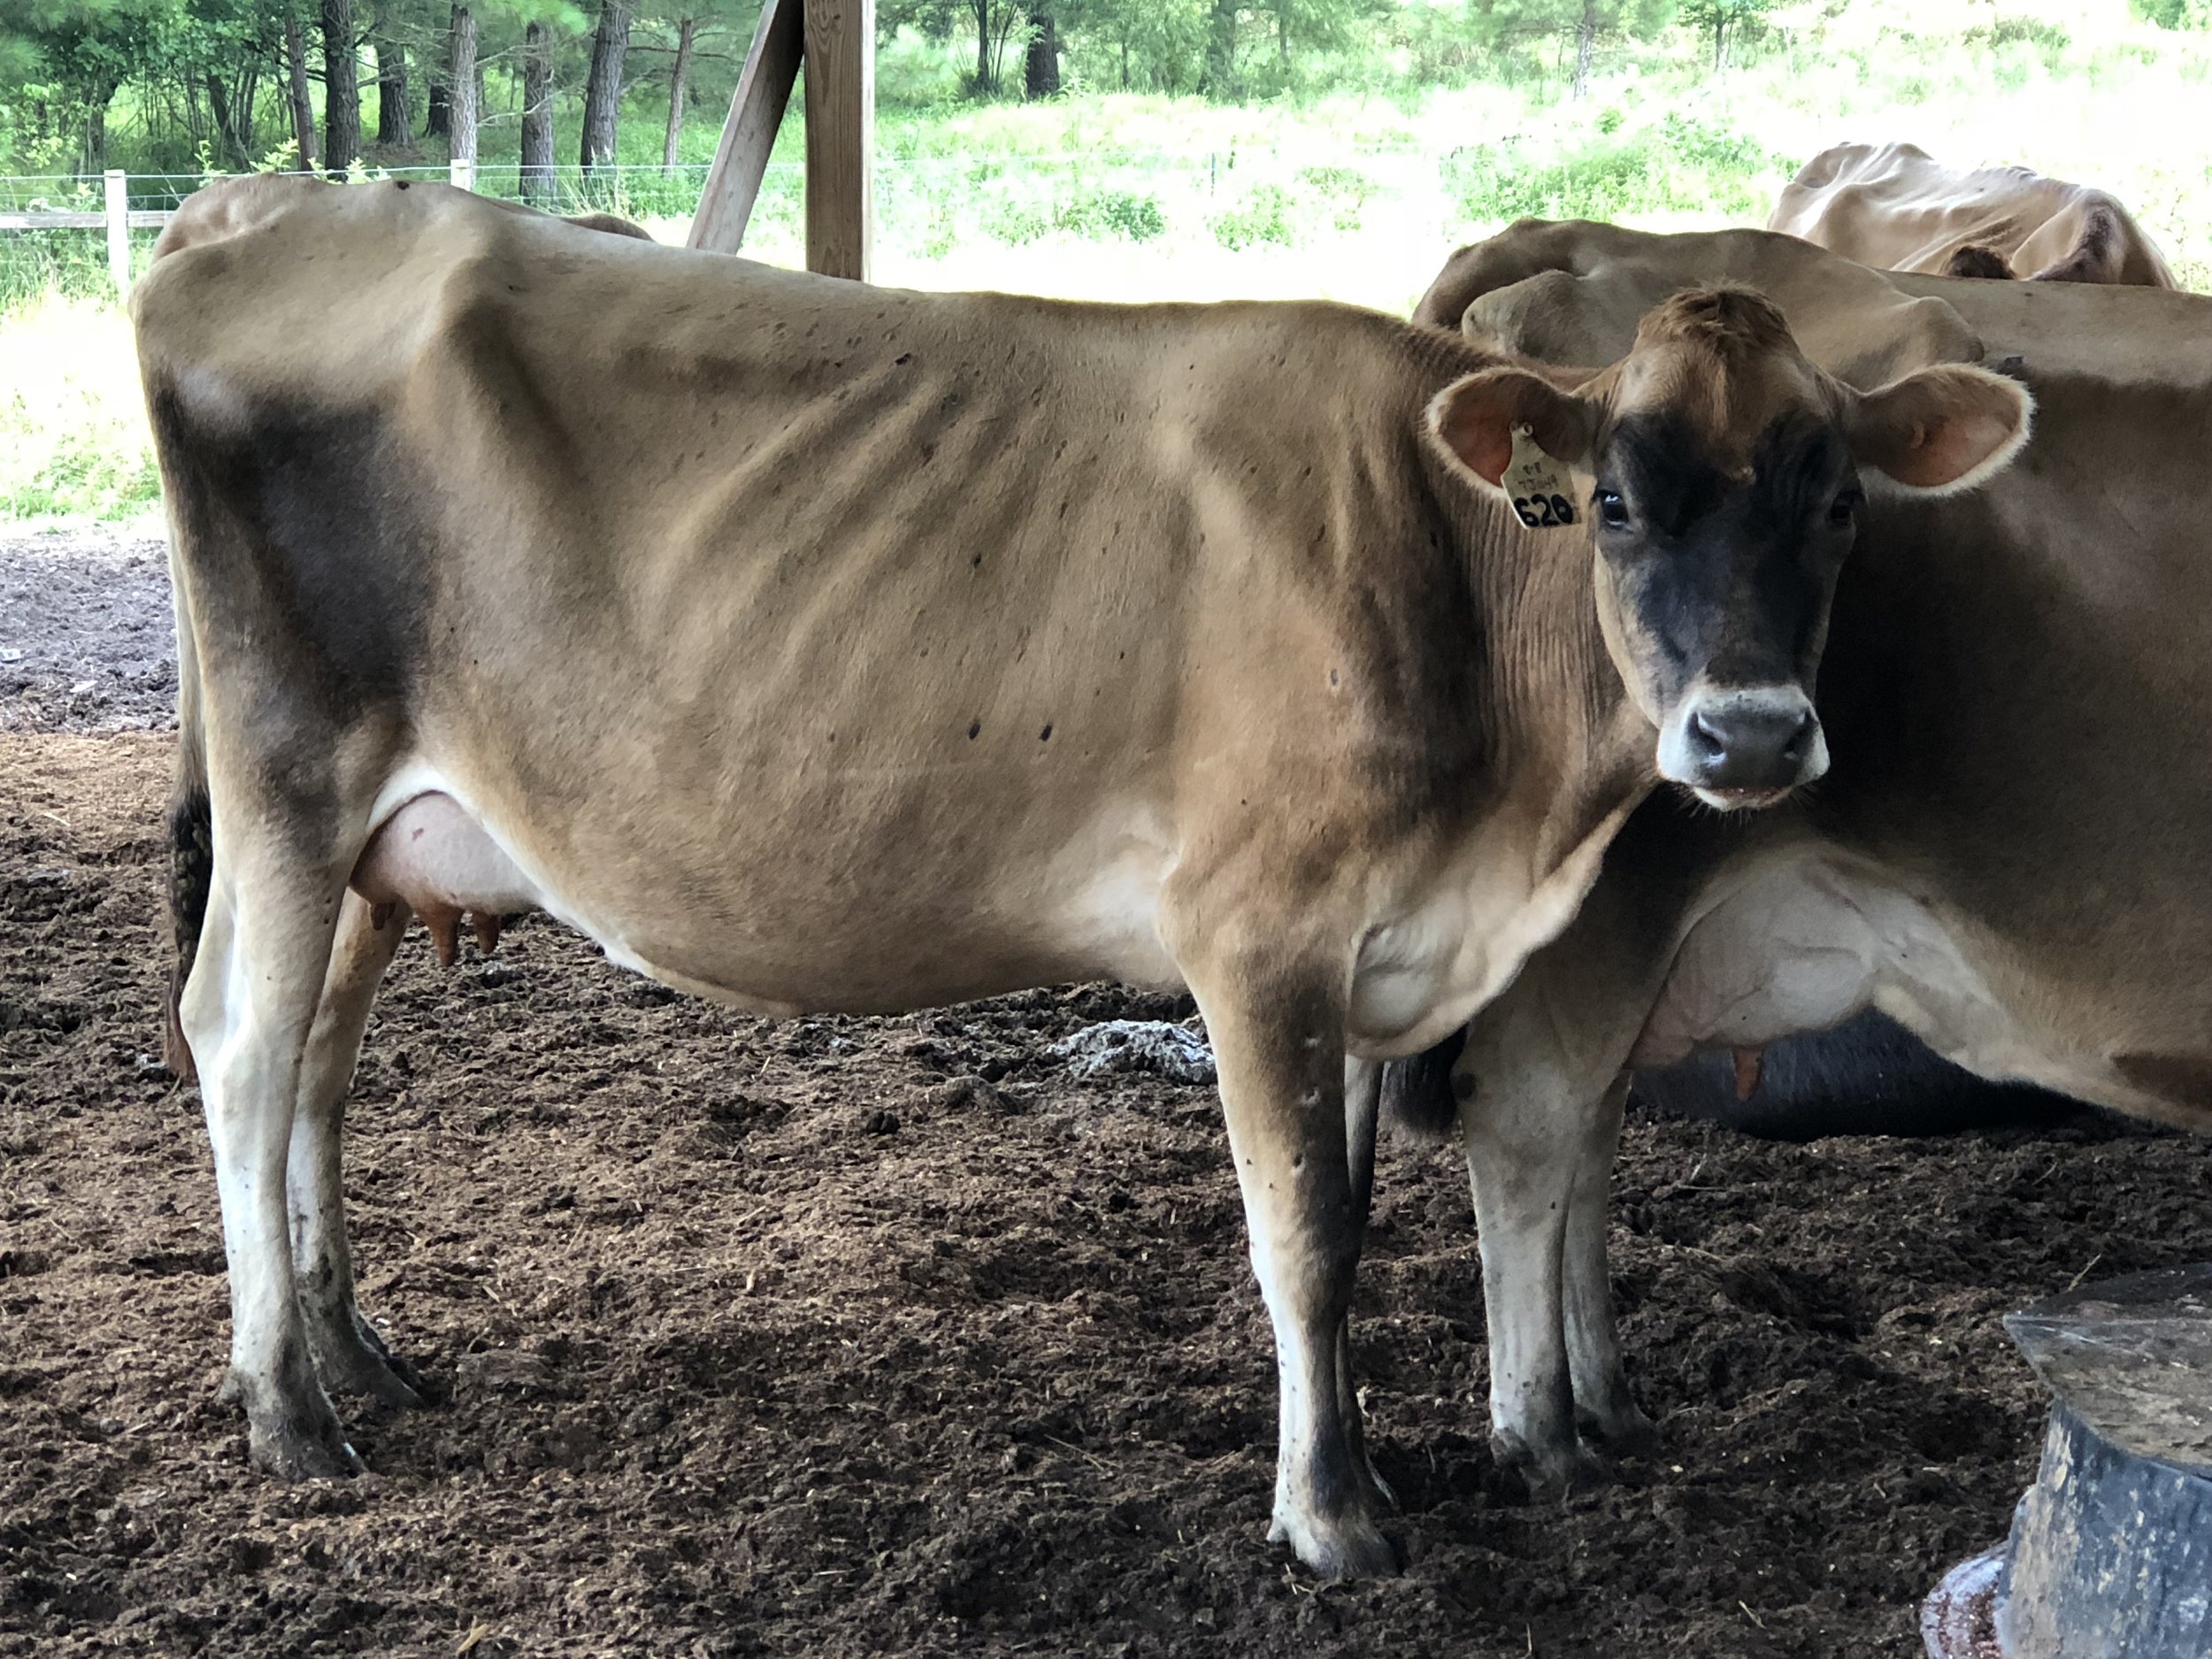
One of our sweet cows, a few weeks after calving. (When the mama cow’s body first produces milk is when she is the skinniest)

One of our sweet cows, a few weeks after calving. (When the mama cow’s body first produces milk is when she is the skinniest)

We often get asked “Why are your cows so skinny?! Don’t you feed them anything?!” I can promise you, our girls get the highest quality hay and pasture we can offer them. There are a few things that make dairy cows different from the beef cows you’re probably used to seeing in fields (black angus, white charolais, or the brown/white faced herefords)

  1. 1. It’s hard to keep dairy cows on a pasture based system. Grasses are mostly made up of proteins, while high quality pastures are usually super high in protein. They are also low on energy. Just like a human, it’s hard to keep a cow looking plump eating only protein and skipping pasta.

  2. Dairy cows (especially jerseys, like we milk) make so much milk in the first few months of their lactations, it isn’t even possible for one calf to drink all of it. A jersey cow can easily maintain 4-5 calves by herself. Producing this much milk, reduces body fat.

  3. Dairy cows are not supposed to be “fat”. It would actually be unhealthy if a dairy cow looked like a typical beef cow like a black angus. Their health would be at serious risk and their bodies in danger of going into ketosis. That may be a buzz word in today’s culture and a state to strive for in your own diet, but it’s seriously unhealthy for dairy cows!

  4. We don’t feed grain in the amounts that conventional dairy farms do. Most dairy farms feed what is called a TMR (Total Mixed Ration) this gives the cows everything they need: Minerals, hay, grain, etc. in order to properly balance their diet completely. That being said, often times, the cows eat the TMR and nothing else. No pasture, no grass, nothing. They’re kept in the barn to eat their TMR which is designed to keep their body balanced and producing the highest amount of milk possible. The result of a TMR? Often times, (depending on the ration. If it’s too high in grain) it causes the cows’ livers to burn out and puts the delicate pH balance of the cows stomachs out of balance which can cause you to lose your entire herd of cows!
    **Did you know: The bacteria/pH in the cows rumen (one of their multiple stomachs) is what actually feeds the cow! The cow eats grass and hay which feeds the bacteria and the bacteria feeds the cow!

  5. We often hear from other farmers how healthy our cows look. This is always so comforting to hear! We like to know we’re doing a good job. Our girls’ fur is slick (smooth, not rough or patchy looking), their eyes and ears are bright, and they have good, strong appetites.

We work very hard to keep our girls healthy and happy. We don’t push them to produce the highest amount of milk possible so their bodies don’t burn out after 3-5 years. (Some of our best producers are 7+ years old and going strong!) We keep their diets as natural as possible for their own health and for yours as well! Whatever they eat, goes into the milk which is why we avoid GMOs, antibiotics and other substances that could adversely effect their health or yours.

Recipe: Stromboli AKA The Big Mac, Perfected

Y’all…I can’t even. This one is just too good not to share.

Let’s start by saying, there are a few things you should know about me and our family.


1. We love Publix. We literally go almost every week. It started because Ben grew up in FL and something their family did was get subs from the deli at Publix. When he moved to TN when he was 16, he was pretty much disgusted with every other sub shop option. Now we go because I love the entire experience: employees are amazing, free samples and recipes, buy one get one free sales CONSTANTLY on anything and everything, THEIR SUBS. Yeah, it’s the best.

2. I’m not gonna lie, I grew up eating McDonald’s. And again, being completely honest, I still love the taste of a Big Mac. But I really do avoid it at all costs because I know it’s not good for me.

This is a problem because I miss that flavor. Well, guys, Publix has fixed this conundrum for me. This recipe tastes like a Big Mac…But imagine the perfect Big Mac. It doesn’t taste fake, it doesn’t taste chemically, just oh so good. If fast food went to Heaven and was perfected, it would taste like this.

Recipe can be found here. But I’ll include it below as well.

IMG_5148.JPG

GREAT AMERICAN BURGER STROMBOLI

source: http://www.publix.com/recipes-planning/aprons-recipes/great-american-burger-stromboli

Ingredients

Nonstick aluminum foil
1 lb lean ground beef (I used ground pork! Both are delicious!)
1/3 cup Thousand Island dressing
1 refrigerated pizza dough (14–15 oz) (I make my own pizza dough! Use this EASY recipe! You’ll never go back.)
12 dill pickle chips (I chopped up a Claussen dill pickle half. Because we’re pickle snobs…)
6 slices American cheese (eew. No. Use real cheese, please.)
**Optional ingredients
Half small onion, diced
Hand full fresh spinach, chopped

Bacon crumbles. A goodly amount.

Steps

  1. Preheat oven to 400°F. Line baking sheet with foil. Preheat large, nonstick sauté pan on medium-high 1–2 minutes. Place meat in pan; brown 4–5 minutes, stirring to crumble, and until no pink remains. Drain any fat from meat, then combine meat and dressing in large bowl.

  2. Unroll dough onto lined baking sheet and stretch into a 13- x 9-inch rectangle. Place meat filling lengthwise down center of dough, spreading evenly, leaving a 1/2-inch border. Top with pickles and cheese. Roll one long side tightly around filling (like a cinnamon roll); press edges to seal.

  3. Bake stromboli 18–20 minutes or until brown. Let stand 5 minutes to cool. Slice and serve with additional dressing on the side, if desired.

A couple of quick notes from my version:

  1. I added diced onions because onions are probably my favorite allium in the world.

  2. I added chopped fresh spinach because our family loves spinach and I try to sneak it in wherever I can. (And not tell my 3 year old)

  3. I used some of our ground pork rather than the burger because it’s what I had on hand at the time. When I tried the sample at Publix, it was made with ground beef. Both are delicious.

  4. If you love pork and you wanna add some bacon bits, it’s probably a good idea. We did. It made it like a bacon cheese burger.

  5. Of course I didn’t use american cheese. It’s not cheese. And I hate it. I used a blend of 4 types of cheddar. But swiss would be amazing in this.

You need to try this immediately. It’s so unbelievably good and will be added to our regular menu, for sure! Your taste buds will thank you.

~JoAnna B.

Yes, you can still drink milk!

Most people are probably familiar with lactose intolerance. It means that ice cream, butter, yogurt, cheese and most any other dairy product have suddenly become the enemy and you now have to find an alternative form of milk to put on your morning cereal or in your morning cup of joe. Personally, I think if I were told I could no longer have dairy, I would probably burst into tears every time I was in the dairy section of the grocery store. Part of this is probably from being a dairy farmer, but my goodness, do I love me some dairy!

Don't despair yet though. One of the cool things that we've learned over the years of being a raw milk dairy is that raw milk can still be consumed by many folks that are diagnosed with lactose intolerance. Yup. Who knew?! When milk is pasteurized, it burns everything beneficial out of the milk.
If you think about anti-bacterial hand sanitizer for a second, it kills all bacteria. Good or bad. it's all gone. They do warn you of this on the labels "Kills 99.9% of bacteria." Great! But you kinda want some bacteria or else your immune system gets out of whack and you get sick more often because you aren't exposed to enough germs for your body to build up antibodies to protect you.

I promise I'm coming back to milk. Pasteurization is the anti-bacterial of the dairy world. It was originally invented because refrigeration didn't exist and people got sick. (That's the extremely simplified version) However, they can't really control what happens to all of the good stuff that's in milk when it's heated to kill the bad sickness causing bacteria. But those good bacteria and wonderful enzymes are what help you to digest the milk. And raw milk still contains those! Often times folks aren't lactose intolerant, their stomachs simply can't digest milk that has the very things that help the body digest that milk taken out of it.

Time after time, we've gotten calls, emails, texts and facebook posts from customers thanking us profusely for providing them with milk. They are so excited to be able to drink milk again! (Can you imagine not being able to drink milk with your cookies??)

There is more than one allergy that gets the blanket diagnosis of lactose intolerance so obviously not all folks that get this diagnosis will be able to have dairy, raw or not. But it's DEFINITELY worth a try! Life is too short to live without dairy. And besides, what else will you drink with delicious homemade cookies?

Have crockpot, will cook meat.

I recently discovered just about the simplest recipe for cooking ANY meat.

Farming is a lot of work and often times one of the things that falls to the wayside is cooking. (Among other household chores) When we decided to throw kiddos in the mix, meals kinda became more mandatory. When it was just the two of us, we'd skip a meal (or 2...) here or there if we were simply too busy to make anything. Dinner was particularly a challenge because we often wouldn't finish the evening until 7 or 8pm. Kinda late to start cooking. Sometimes we would have enough left from what we made from lunch to carry over to dinner, but generally, it would be starting from scratch. One of the conveniences that most folks probably take for granted (I know we did!) is being able to either run out to the grocery store or a restaurant and grab something quick on these late nights. Since we live a minimum of 20-30 minutes from the nearest grocery store or restaurant, that's not really an option for us. Not to mention, you don't wanna do that EVERY night!

I had to come up with a solution. Broiling is pretty quick but if I don't have the presence of mind to thaw something around lunch time, it ain't happenin'. I found a recipe for ribs that was extremely simple and delicious: beer, ribs, BBQ sauce in the crock pot. We tried it. Man oh man! That was some good eating! As I experimented more, I discovered that this simple recipe can actually be used with virtually any cut of pork OR beef! Here's what I do:

1 can or bottle of ANY kind of beer.

I tend to prefer darker beers for this because they give it a deeper, richer flavor, but seriously. Any beer. (you can also use wine! Dry wines are best.)

1 hunk of ANY kind of beef or pork

Yep. Just about anything works. Our favorites to use are:
Beef

Ribs
Stew meat
Lower quality cuts of steak (Round, loin tip, sirloin, etc)
Chuck or shoulder roast
Brisket (Holy dang. It's good on brisket, y'all.)

Pork
Ham slice
Shoulder slice
Ribs

The shoulder slice lends itself to this recipe a bit better and ham slice lends itself to broiling like pork chops or roast in the oven just a little better but they are fairly interchangeable from what we've found.

Your favorite seasonings

We use Montreal Steak. (It's just salt, pepper, dried garlic and dried onion)

BBQ Sauce

Make it or buy it. Whatever you do normally. I do probably a cup or so of this. Depends on the size of the hunk of meat I'm cooking that day. Just eyeball what looks good. (**Note: if substituting wine for beer, you may want to leave BBQ sauce off.)

And then what? You may be asking. Then turn your crock pot on. (That's an important step...Ask me how I know.........) I usually shoot for 4hrs on high or 8hrs on low.


When you pull that delicious hunk of meat out of the crock pot, you're gonna be pretty happy. We either serve over rice with veggies as a side or put it on sandwiches like a pulled pork (or beef). Either way is delicious. You can dress it up, or dress it down. Add veggies, switch up your sides, whatever works for you and your family. But let me tell you, you will not be disappointed if you try this. You'll probably just wish there was more.